
Aquarium lighting timer on Arduino ESP8266
In this article I’d like to tell the story of building the lighting timer for my small 120 liter aquarium. Just when they said lights should go up and down on schedule I knew it it’s not going to happen in my house. Just won’t work that way. So I decided to automate it.
Version 1
Initially I built a prototype in the big plastic box. It went with the temperature sensor, LED display, power override button and two independently commutated pairs of sockets. It worked off of and old iPad power adapter. Here how it looks inside and outside:
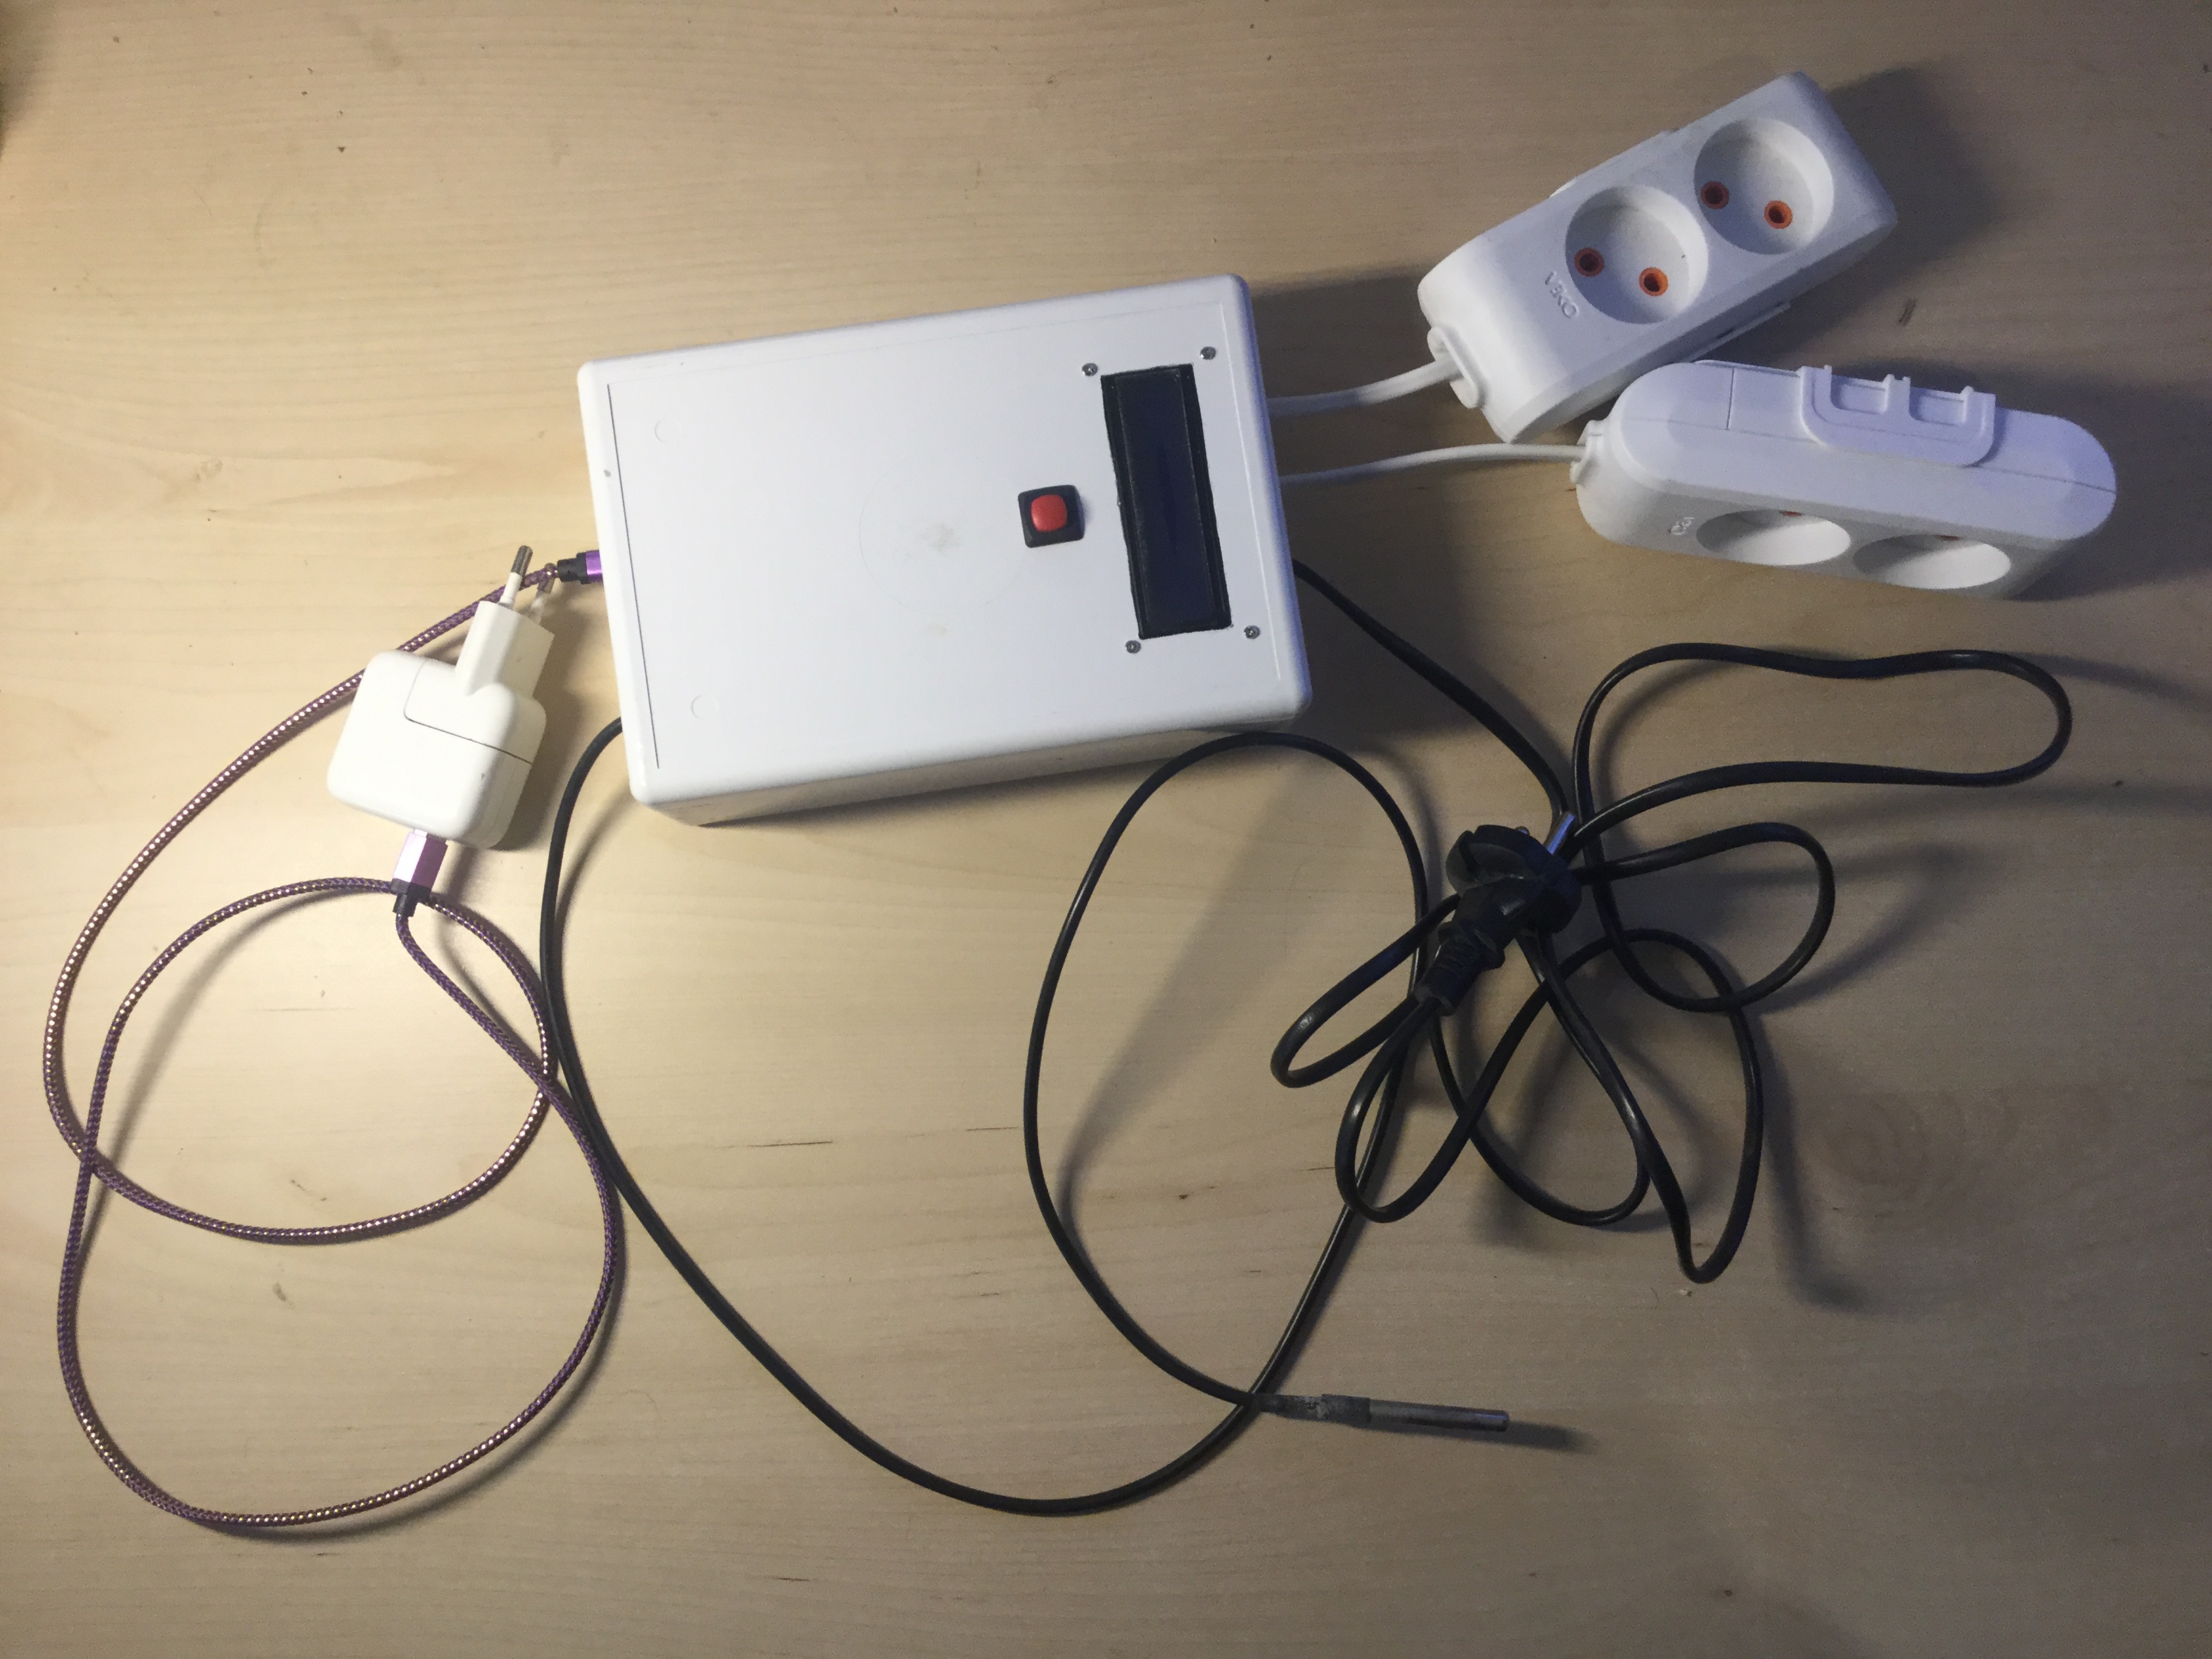
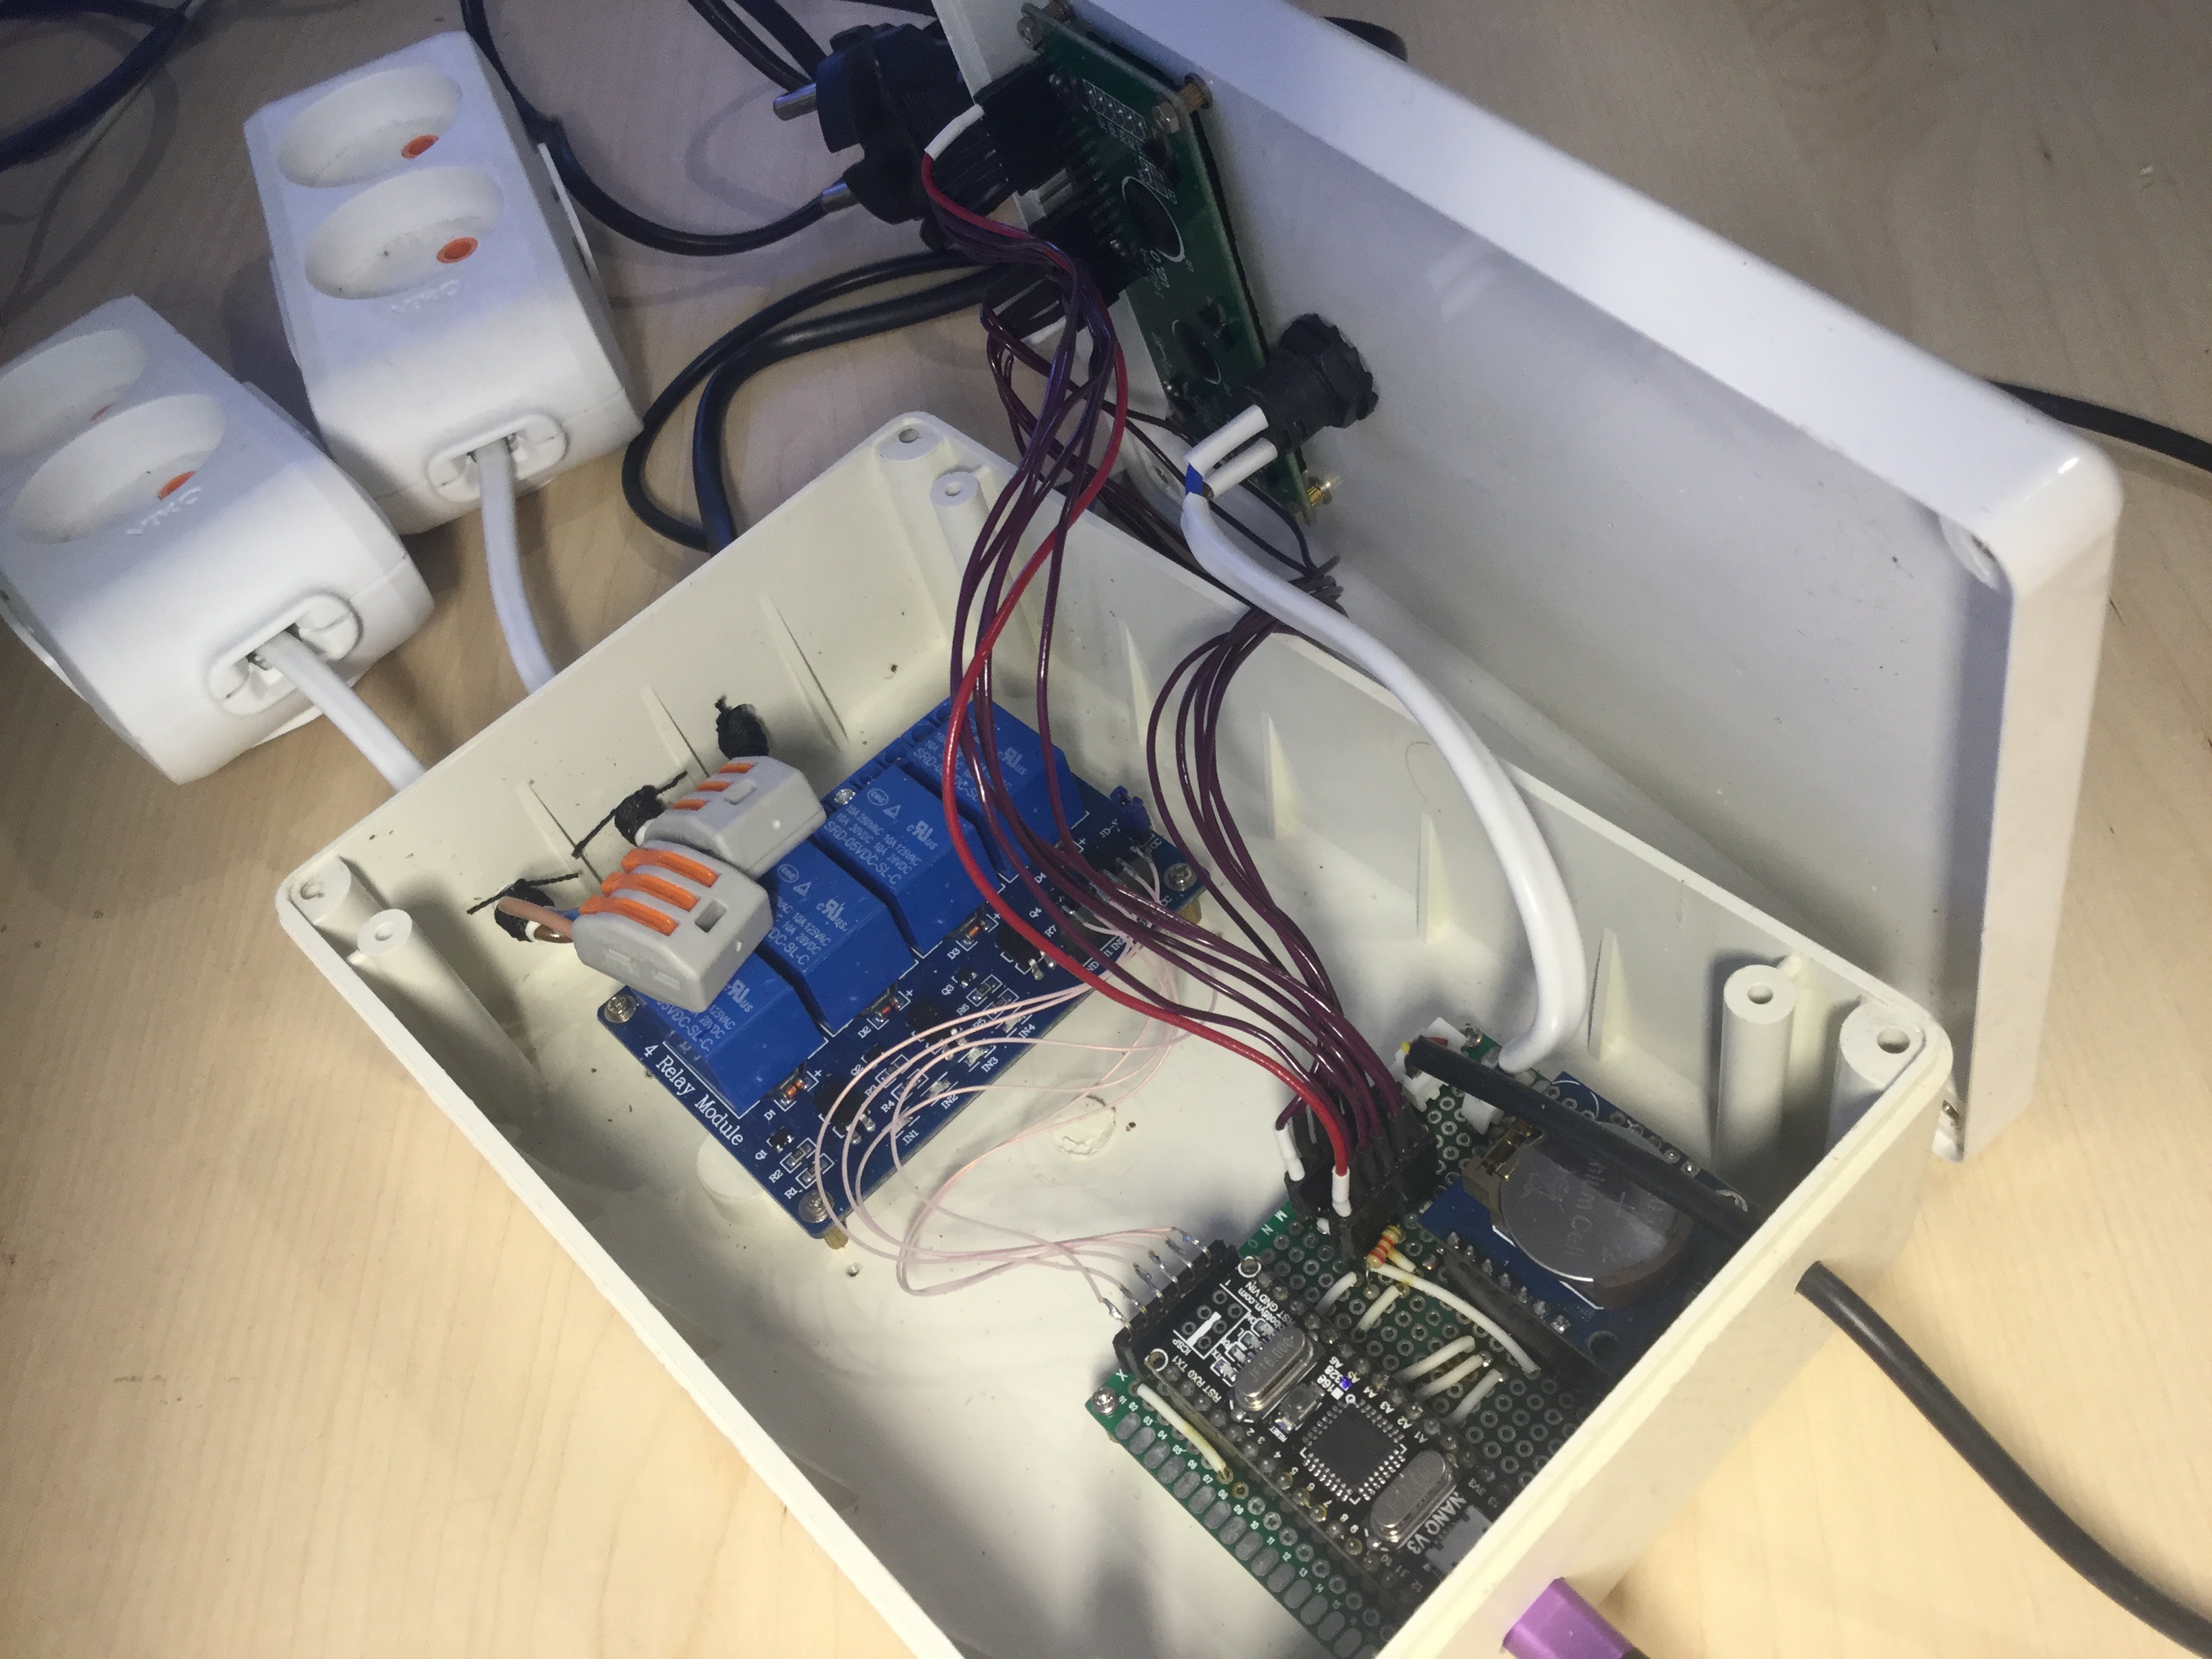
As you can see, it was pretty complicated inside. Built on Android Nano V3 328. Included power-independent RTC and used the 4-relay commutation module.
Practice showed all that wasn’t quite reliable and useful. Thermometer with one of the commutated power sockets were intended for heating circle, but then I discovered that my heating is already regulated and maintains the temperature. So that’s unnecessary.
What’s left was the timer module for the lighting. I didn’t need the screen too as it’s always inside the aquarium stand and no one sees it anyway. Here is where the story of the Timer v2 begins.
Version 2
It didn’t happen immediately after I decided to rebuild my first iteration. Over the while I’ve got excited about ESP8266 and figured that might be a great choice for the next gen timer. It is small, working on 3.3v, allows to connect to my local network to check status and make remote switching if necessary; all in one small body.
Here’s the schematics of what I came up with:
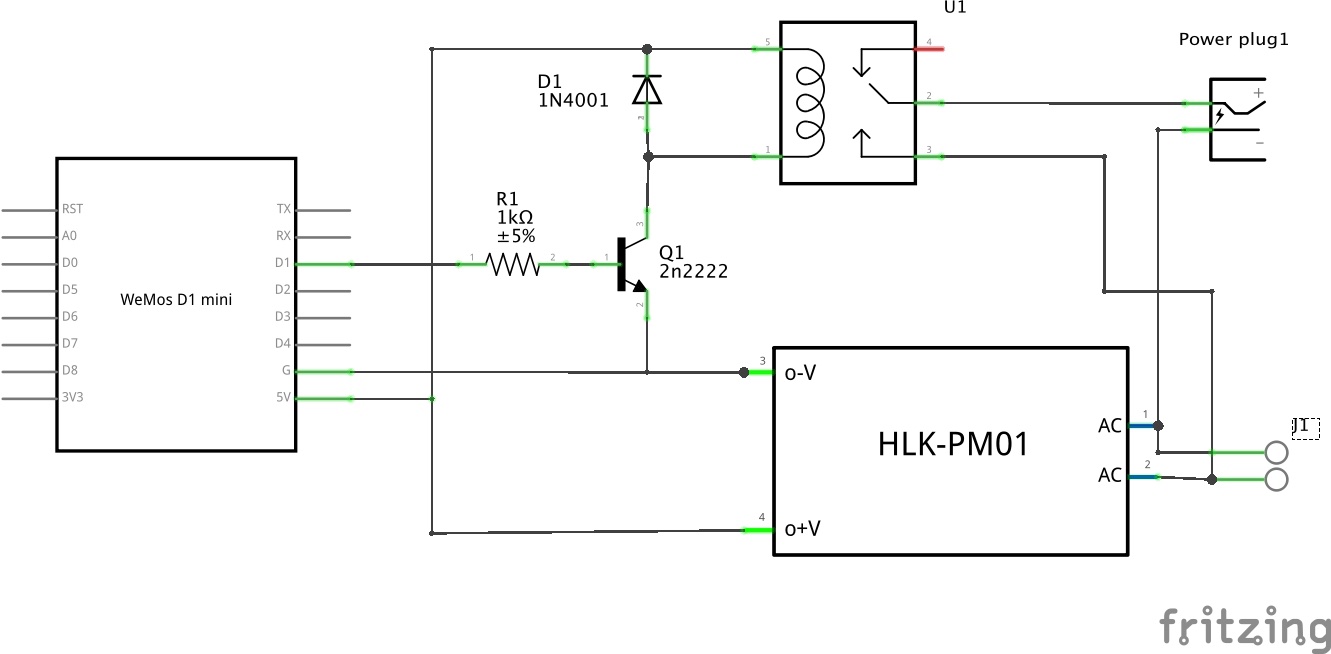
220V power comes through J1 and is converted into 5V that is used to feed WeMos D1 Mini and switch the relay module. Since WeMos D1 Mini operates 3.3v, we need to use a NPN transistor as a simple switch. Traditional choice is 2N2222 with a 1kOm resistor in the base circuit to limit the current. We also need a D1 diode to cut out reverse current in the relay circuit. That’s all schematically.
The casing was designed in Sketch Up and 3D-printed in three iterations, all due to small errors in measurements. I used PETG plastic as the material and it worked very nicely. Here’s the model and the result:
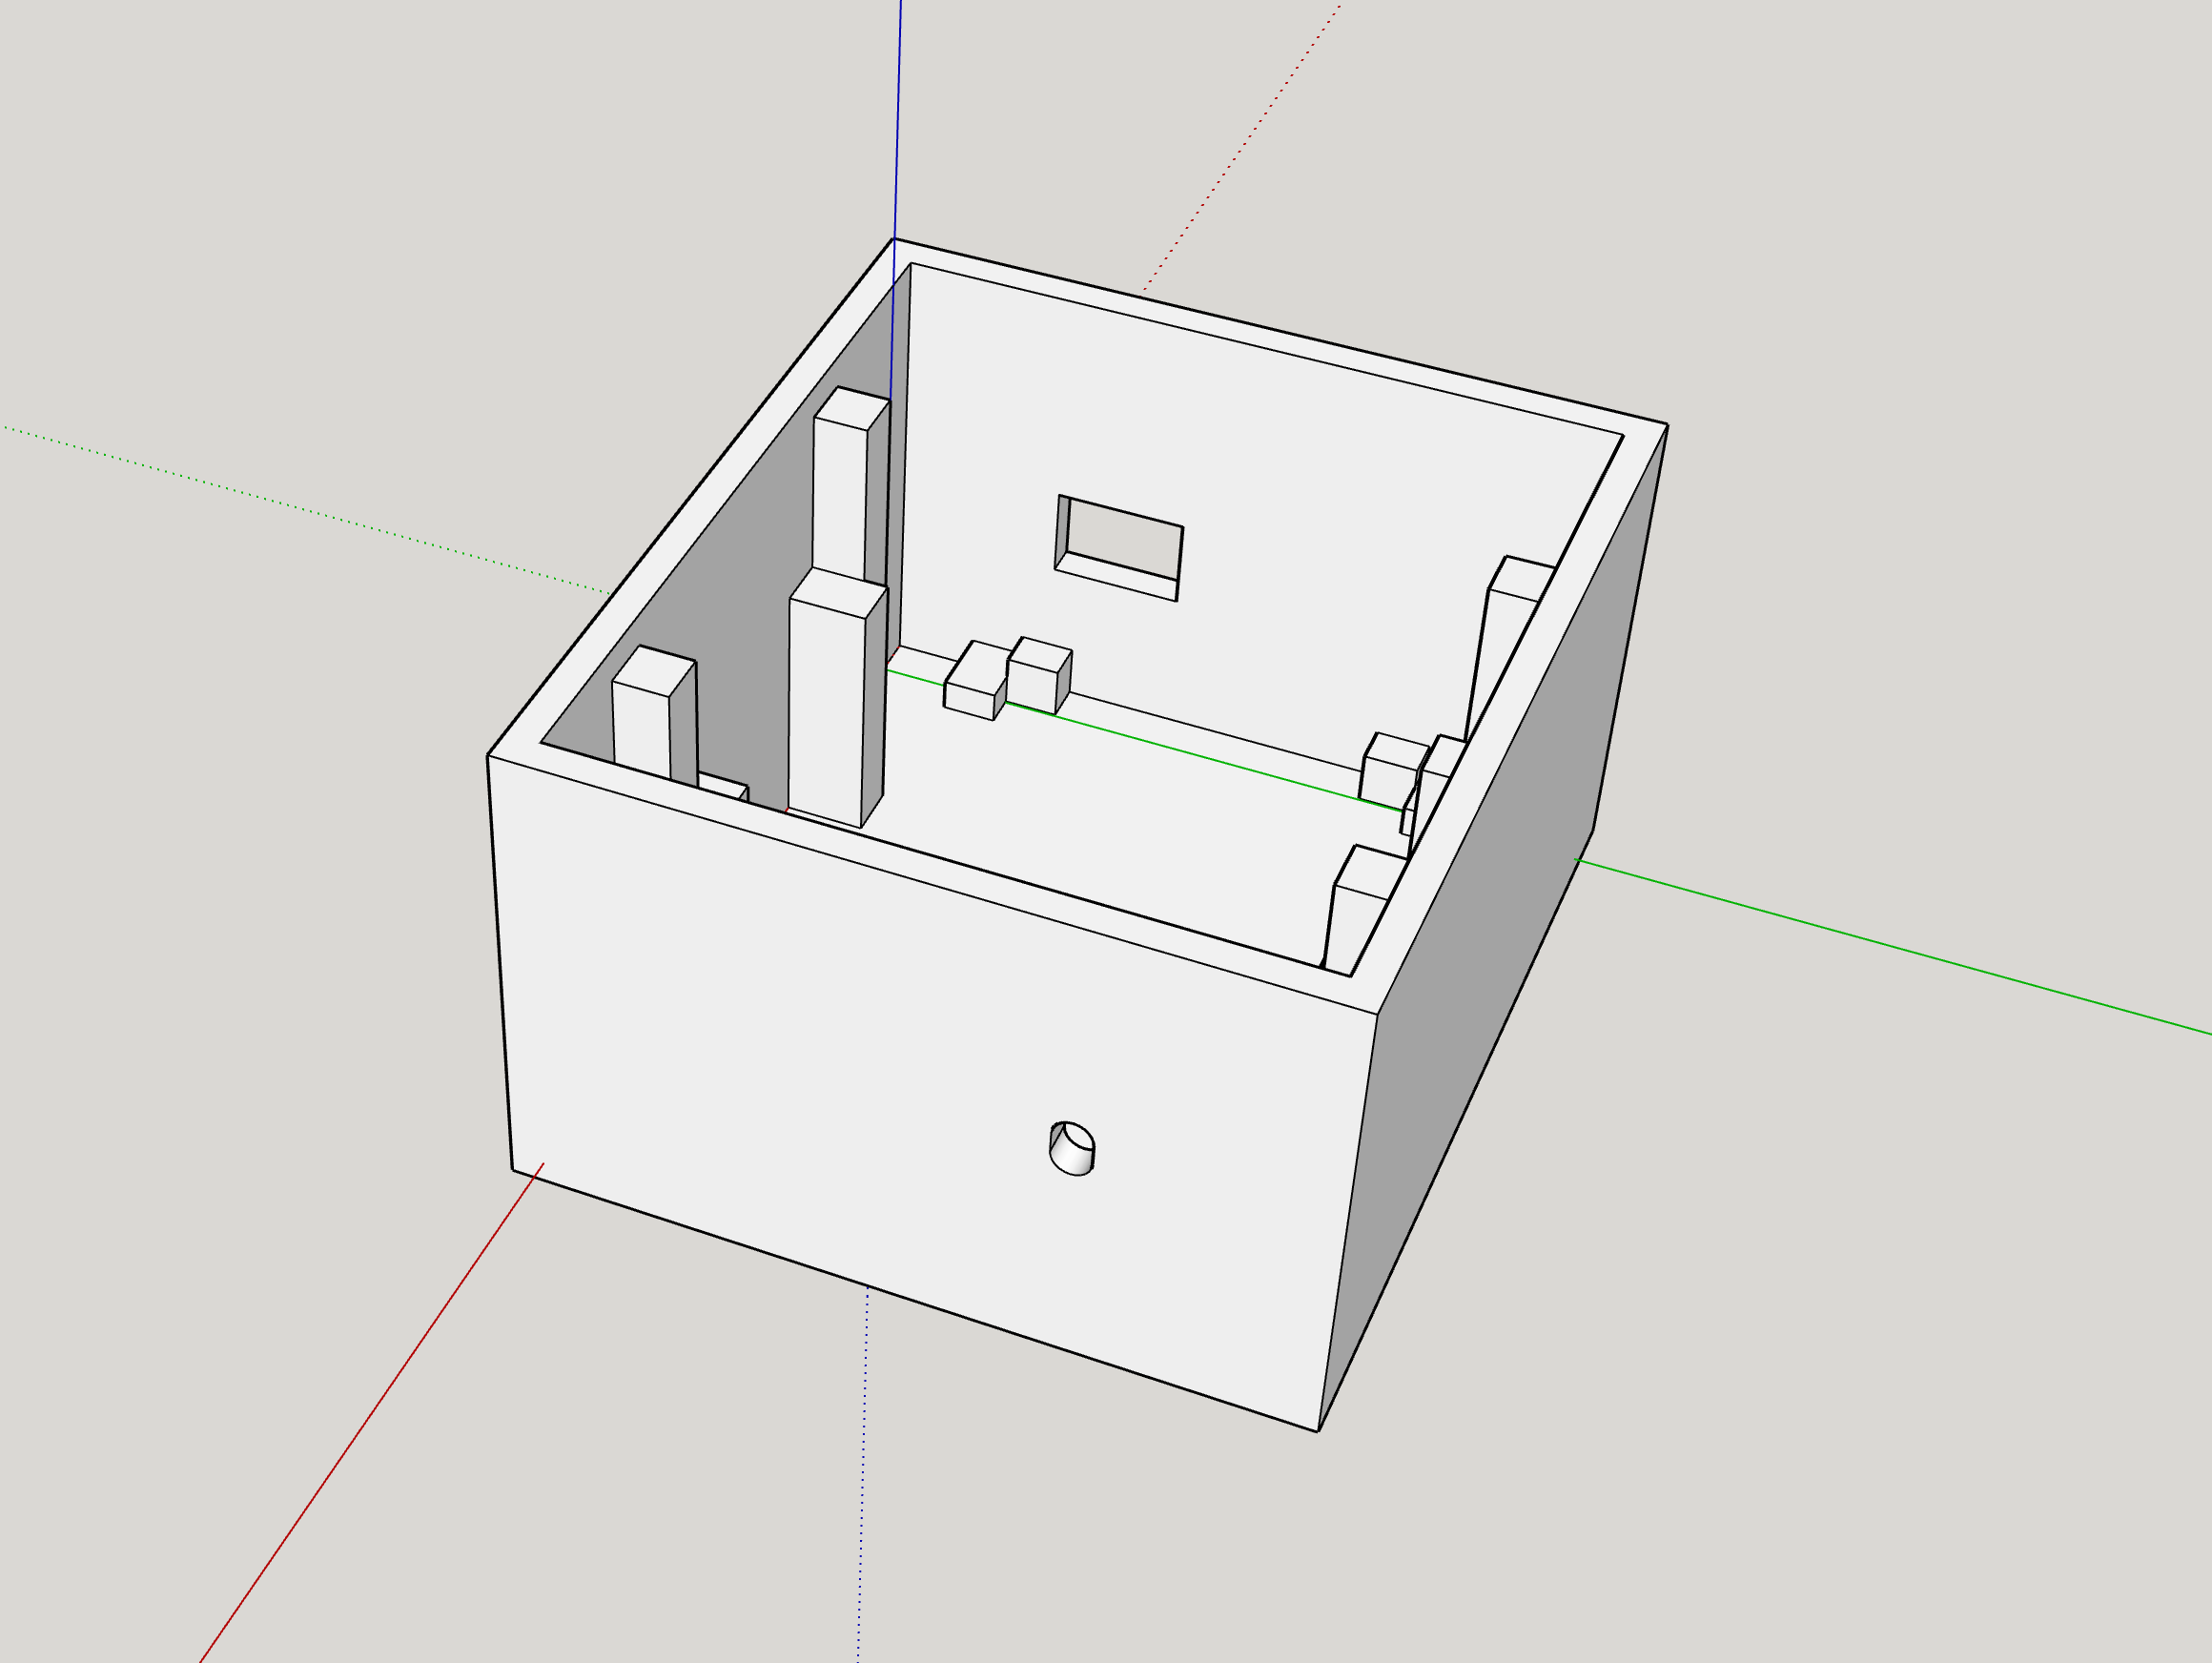

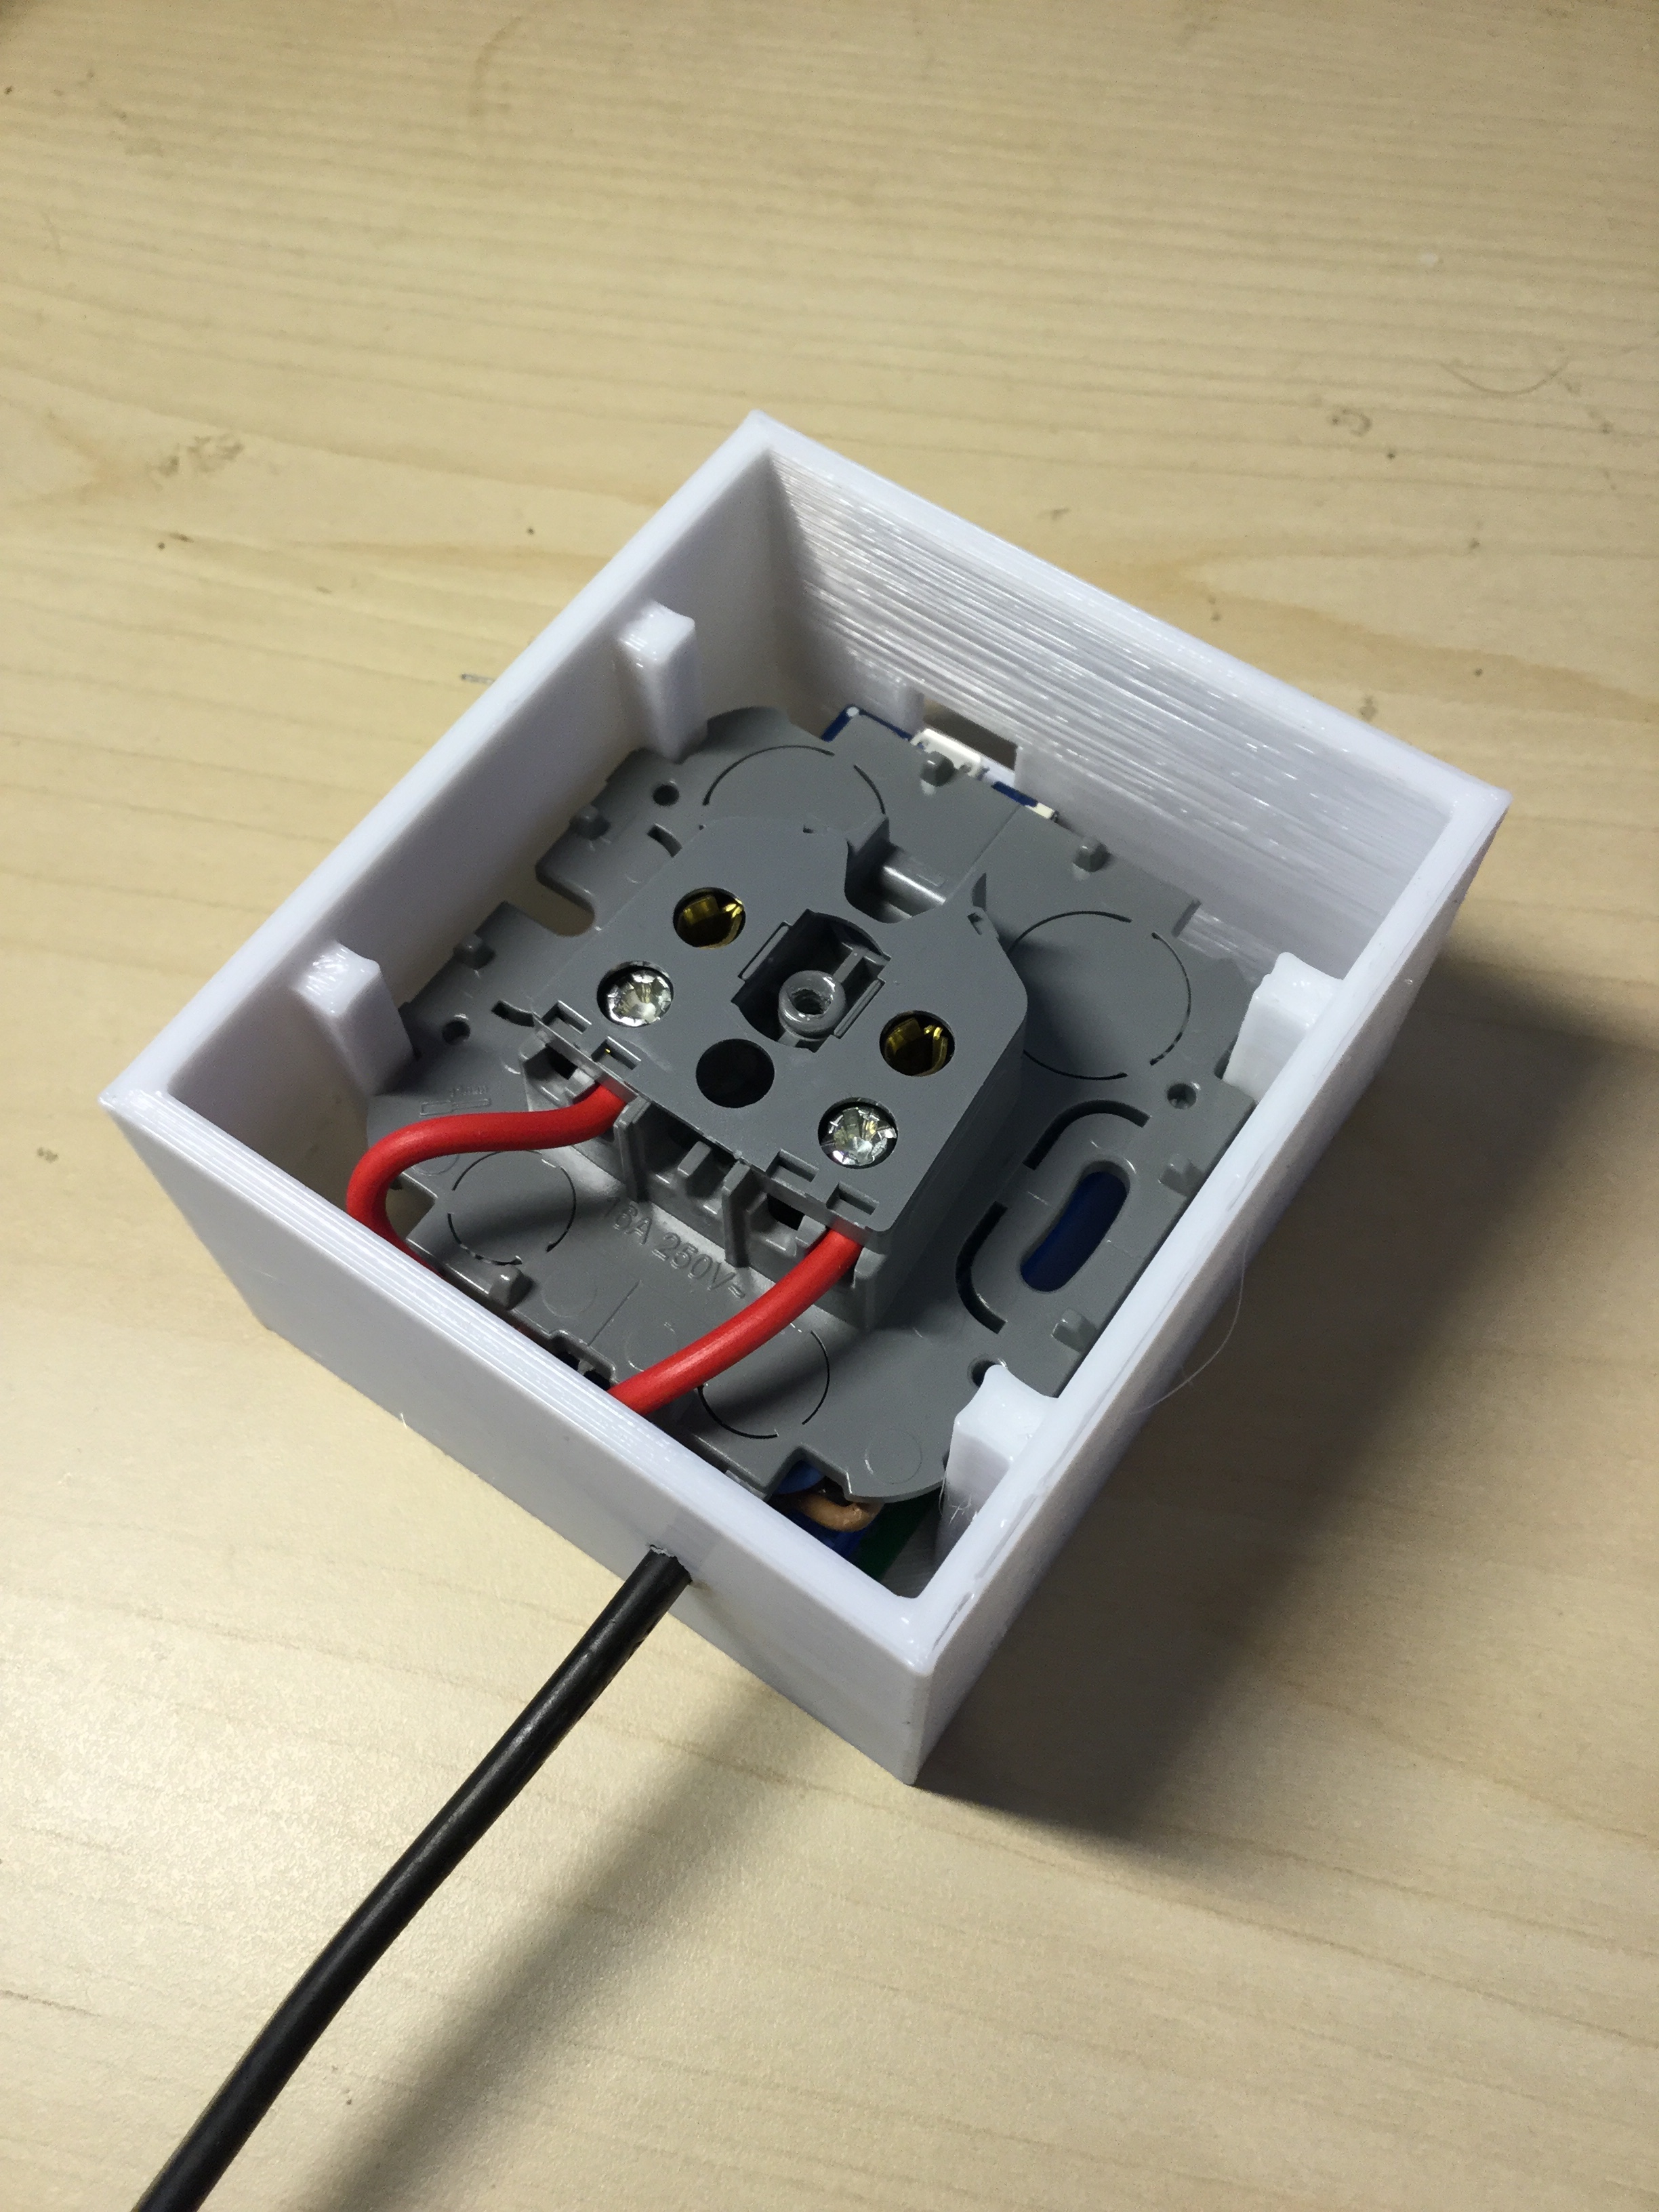
Everything mounts without screws. It’s so nice to be able to print stuff in whatever dimensions you need!
Software
Finally, here’s the software running on the board: